Any guitar player who is a fan of the classics like Led Zeppelin or George Harrison may know about the guitar slide technique. It’s the method that guitarists use to get that ‘sliding’ sound from the instrument. The technique was created in the early 20th century and quickly became famous all over the world.
Whether you are entirely new to using the techniques of a slide guitarist or have tried (and maybe failed) at this before, we’re here with our guide on guitar slides. Follow the six easy steps below, and you will become a master in no time.
Step 1: Finding Which Finger Works the Best
A guitar slide goes on one of your fingers, and the first step to nailing this technique is choosing which finger feels the most comfortable for you. Everyone has a different comfort level, so make sure you are picking the right finger choice for your personal playing style.
There are three options for slide guitar players in terms of fingers. Your best fingers on either hand will be your ring finger, middle finger, or pinky. Remember that you will still need one of your fingers to mute the strings as well.
Each choice of slide finger has its own pros and cons. These include:
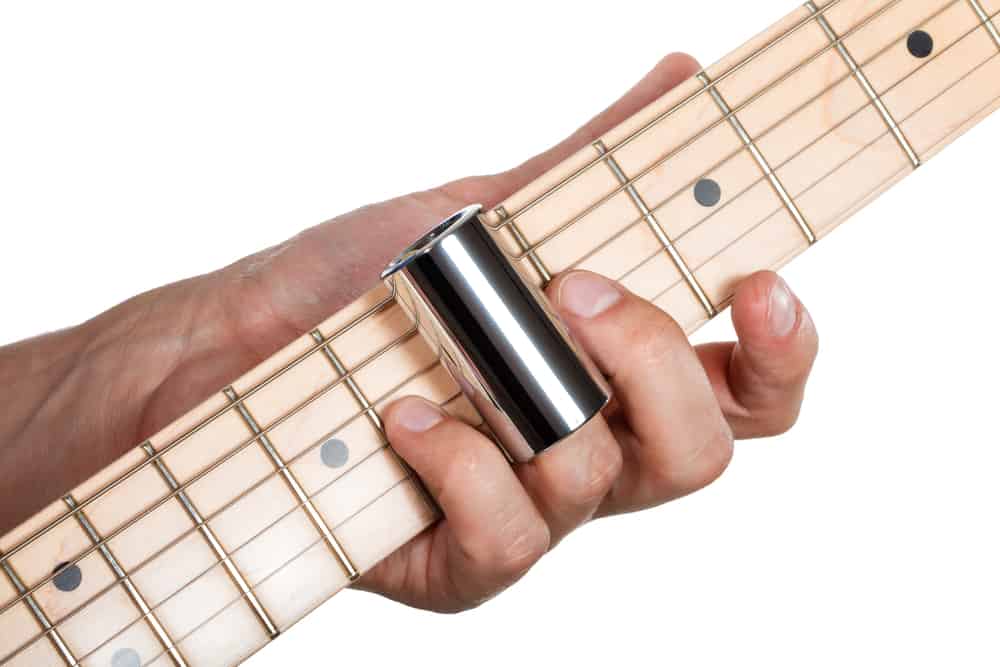
- Middle finger – Larger sliders can be used to make fatter tones. However, if you do choose your middle finger, then you will not be able to play anything with the rest of your fingers on that hand. Because of this, you may have a hard time muting the strings behind the slide as well as trying to open tunings. If you’re planning on playing slide guitar only, then the middle finger is the best choice.
- Ring finger – Choosing your ring finger means you can wear a guitar slide that covers your entire fretboard. Strings that lie behind the slide can be easily muted, but you will only have two of your other fingers left to use for playing.
- Pinky finger – Having a pinky finger as your guitar slide choice means you have the rest of your fingers free for regular playing. However, you will need to get a small guitar slide in this case. Because of its size, it’s more than likely that the guitar slide will no cover your fretboard. Therefore it is only useful if you want to play blues-style music.
Step 2: Choosing Your Guitar Slide Type
It all depends on the type of effect you want to create when choosing your guitar slide. The material options you have are:
- Metal – A metal guitar slide will work best if you want to get a heavier sound. Metal slides are used to create longer, slower notes. Typically a metal one will work better on an electric guitar than with an acoustic.
- Glass – Glass guitar slides need a light hand to use and can be hard to get to grips with. They produce a more tinny sound. Open tuning and staying in tune, in general, is also more difficult when using a glass slide.
The best way to choose the right type of guitar slide for you is to experiment. Try out a few different options and see which one gives you the sound that you want from your instrument.
Step 3: Finger and Hand Placement
For best results, you want to place your hand with your finger guitar slide higher up the frets of the guitar. The more distance there is between the strings and the main guitar itself, the less chance there will be of the fret buzzing, scratching, and other extraneous noises. Sometimes these extra noises can be used for effect. If this is something you are interested in, then you still have to stop the slide from making contact with the frets.
Step 4: No Clamping
One of the most important things to remember when using your guitar slide is that you should never apply heavy pressure or clamp down on the strings. Press the slide lightly against the strings instead, and move it up and down the guitar neck as needed while you play. A guitar slide will get the best results when you press down on the strings that go across the slide.
Experienced guitar players can set a practice goal of being able to play with two or three fingers at this point to create different chord shapes. Here are some tips for you to keep in mind when using your slide to play guitar:
- Never clamp down on the strings or the fret. Instead, move the slide up and down while you pick at the strings to play. You will know if something is wrong by the horrendous buzzing noise your guitar will make.
- You will be playing several notes across multiple strings when using a slide. It’s effortless to do this, and this is also one of the pros of learning to use a slide.
Step 5: Add Some Vibrato and Muting
Playing with a guitar slide is all about the vibrato effect on the fret and strings – something that is overlooked a lot by novice sliders. Adding in some finger vibrato when using your slide will mean you get the best musical pitch possible. To do this, all you have to do is move your finger slightly along the slide until you reach the end of that musical phase. Care and consideration should be taken, so you don’t hit any other fret or strings during the move.
Not applying a finger vibrato to your slide when you play could mean you end up with a flat sound from your instrument. There’s a lot of things you need to keep in mind as part of your slide practice such as:
- Paying attention to your pick hand and not just your fret and slide fingers. Many professional guitarists will use a thumb or flat pick as well as their fingers to give their pieces more definition and shape.
- It doesn’t matter what speed you use your slide at because it will already be limiting how fast you can play anyway, especially if you choose a larger model type.
Another part of the slide effect will be open string muting, which can be applied towards the end of your learning process. If you’ve managed to find the sweet spot to play when you’re touching the string but not fret, and it still isn’t sounding right, you should try to focus on your muting.
Let’s say your slide is on your middle finger, moving up and down the strings to create the desired effect you desire. What should your other fingers be doing? The first and second finger on your hand also plays a big part here, as they can dampen down the other strings you don’t intend to play. This stops the strings from ringing out, so you don’t lose any clarity. It will also prevent the piece from sounding messy.
Step 6: Remember the Tuning
Now that you have all of the basics down, there’s this last step to perfecting your slide technique. The tuning! Open tuning is an aspect of guitar playing that cannot be overlooked no matter what cool effects you are trying to add to your music.
If you need some help on tuning your guitar to play with a slide, check out the tips below:
- A beginner guitarist or someone completely new to using a slide can stick to the standard tune and chord pattern for tuning their instrument. The tune goes E-AD-G-B-E. Electric and acoustic guitar strings can both be tuned in this way to use your slide.
- More experienced players who have a bit more confidence in their tuning skills can feel free to experiment with open tuning at this point. Open tuning is a technique that tunes all of the strings to sound like a chord in particular when in reality, they’re not being fretted at all.
- If you are entirely new to guitar tuning and don’t know where to start with your strings, why not try some tuning lessons? It’s never too late to learn, and being able to tune your guitar whenever you need to will help you play the instrument even better than you could before.
- Don’t limit yourself to just the basic tuning styles. As you learn to use your slide, you may also be inspired to try out different tunes and styles you haven’t experimented with before.
Guitar Slide FAQs
What finger do you put a guitar slide on?
You can choose from your middle, ring, or pinky finger to put your guitar slide on. The choice you make will all depend on what effect and tone you want the slide guitar to have.
Can you use a slide on any guitar?
You can use your guitar slides on any guitar that you want to, but many people will swear by a guitar with no frets at all to make sliding much more accessible. The absence of any kind of fret on your guitar means you can slide up and down without hitting any other notes accidentally. Make sure you are using the best finger for the tone you want, and you will be ready to play in no time.
Is slide guitar easy?
Slide guitar is not an easy skill to learn by any stretch of the imagination, but once you have it nailed, the difference it can make to your playing is fantastic. Taking the time and patience to learn about slides and open tunings will improve your playing overall.
How do you set up a guitar slide?
There’s little to no set up that goes along with a guitar slide. The device itself slips onto your finger, and it’s ready to use right away. You will have to use your slide towards the top of your guitar to rule out any buzzy or scratchy noises, though, and don’t clamp down on the strings. Tuning is also a focus for setting up your slide, which you can find out more about in the section above.
Are there special strings you have to use for slide guitar?
If your guitar strings are too light, then the slide technique won’t be as effective as a heavier string would. Slide guitar playing is much different than any other way of playing your instrument. Getting some heavier strings on your guitar will help to maintain a more even pressure as you learn to slide. You should also consider raising your hand further up the neck of the guitar so that the slide doesn’t clack on any other fret apart from the one you want it to.
Conclusion
Above everything else, when learning to use guitar slides, have fun with it. Music is an art, and you should allow your creativity to flow, even though you’re trying to learn a pretty tricky technique. Allow yourself the time and patience you will need to master this technique, and you will soon be using guitar slides as if it were second nature.